Change Company
Choose the local company database LedgerSL will use the next time it starts.
What it does
Choose the local company database LedgerSL will use the next time it starts.
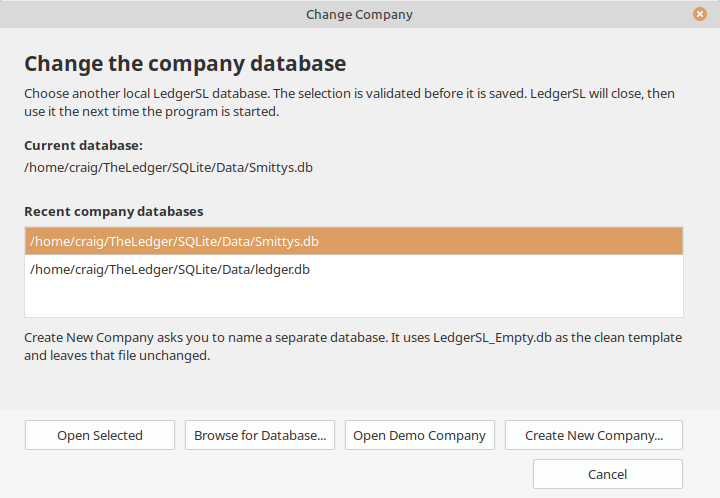
Open Company > Change Company from the top-left menu. Company switching and setup require administrator access.
Open a recent company database, browse for an existing file, or open the demo company.
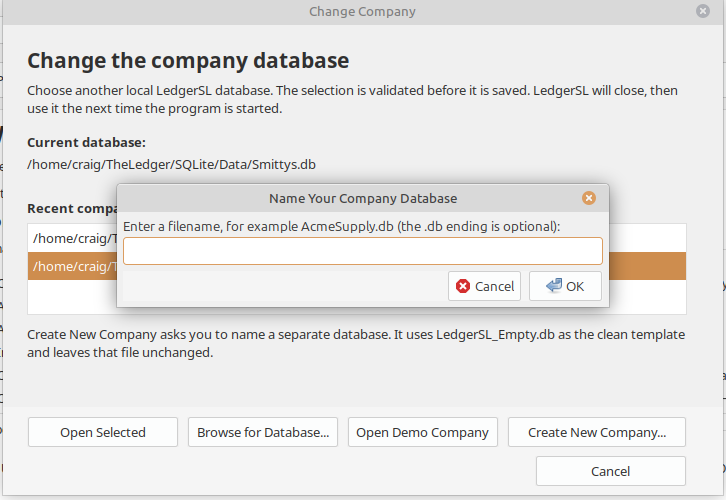
Choose Create New Company to make a separate database from the installed clean template. Enter a recognizable filename such as AcmeSupply.db, then choose its folder.
LedgerSL adds .db when needed and refuses an existing destination or a reserved template name. The template stays available for the next company.
Validate the selection, then restart LedgerSL to work in the selected company. Check the company name and database path before entering data.
Create the database, then set up the company.
- Open the top-left Company menu and choose Change Company, then Create New Company.
- At Name Your Company Database, enter a name such as AcmeSupply.db. LedgerSL adds the .db extension if needed. Use a new name, not LedgerSL_Empty.db or another reserved template name.
- Choose a local folder in the Save dialog. Existing files are not overwritten. LedgerSL creates and checks a separate copy of the clean template.
- Restart LedgerSL into the selected database and verify the company and file path.
- Use Company > Company Setup Wizard to enter the default company details and complete basic setup in that database.
- At Step 4: GL Accounts, load the starter chart, import a CSV, or review and enter accounts manually. Then configure posting accounts.
The two company actions are in the menu because they are occasional setup tasks. They require administrator access.
A single-location company can use one meaningful location, division, and department. A business with several locations or operating areas can add the detail it needs without changing the accounting workflow.