New in LedgerPG · October 16, 2026
From bank statement to a balanced reconciliation.
Bring statement imports, transaction matching, outstanding items, and reconciliation history into one workspace. The Banking Center links bank activity to the accounting entries already posted in LedgerPG.
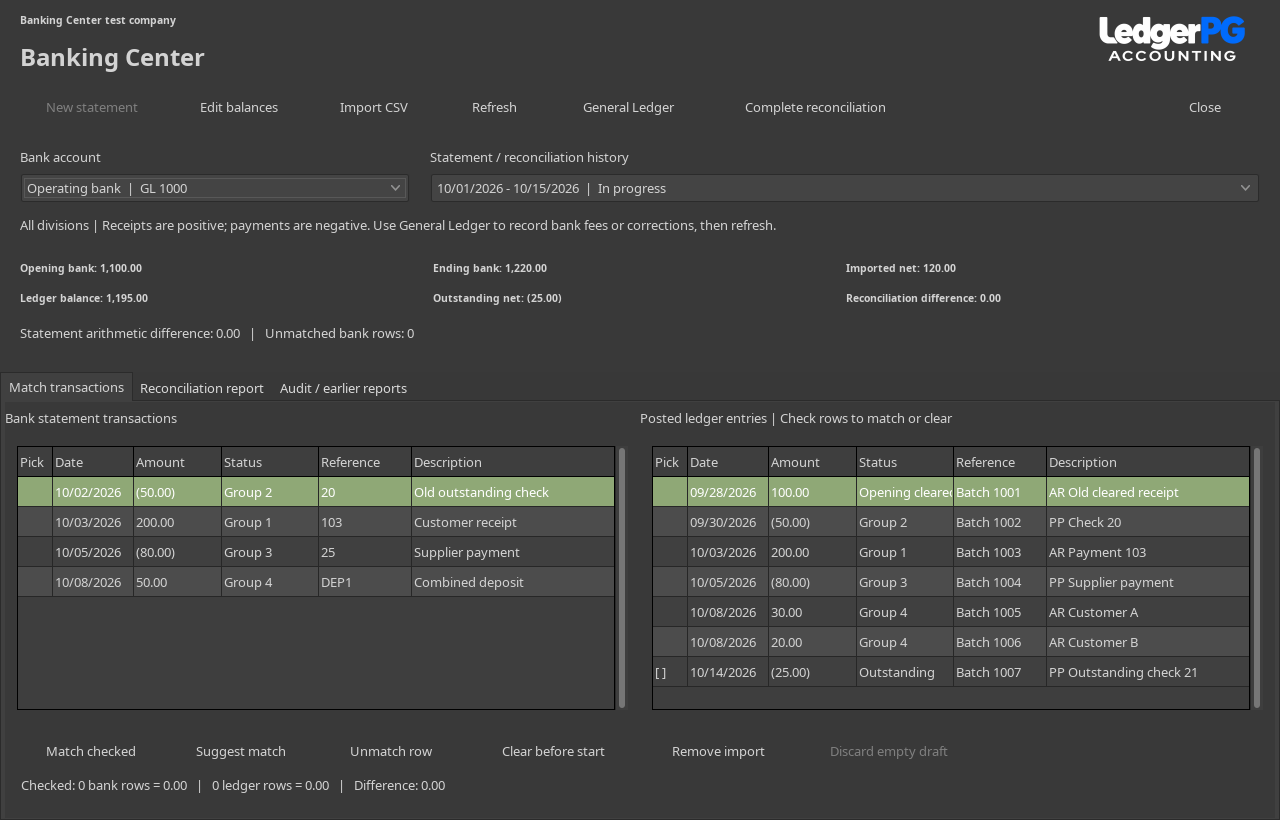
Four steps, with the balances always in view.
Start with the bank statement
Select the bank account and enter the statement dates and its opening and ending balances. Each bank uses its own GL account, with activity included across company divisions.
Preview the CSV import
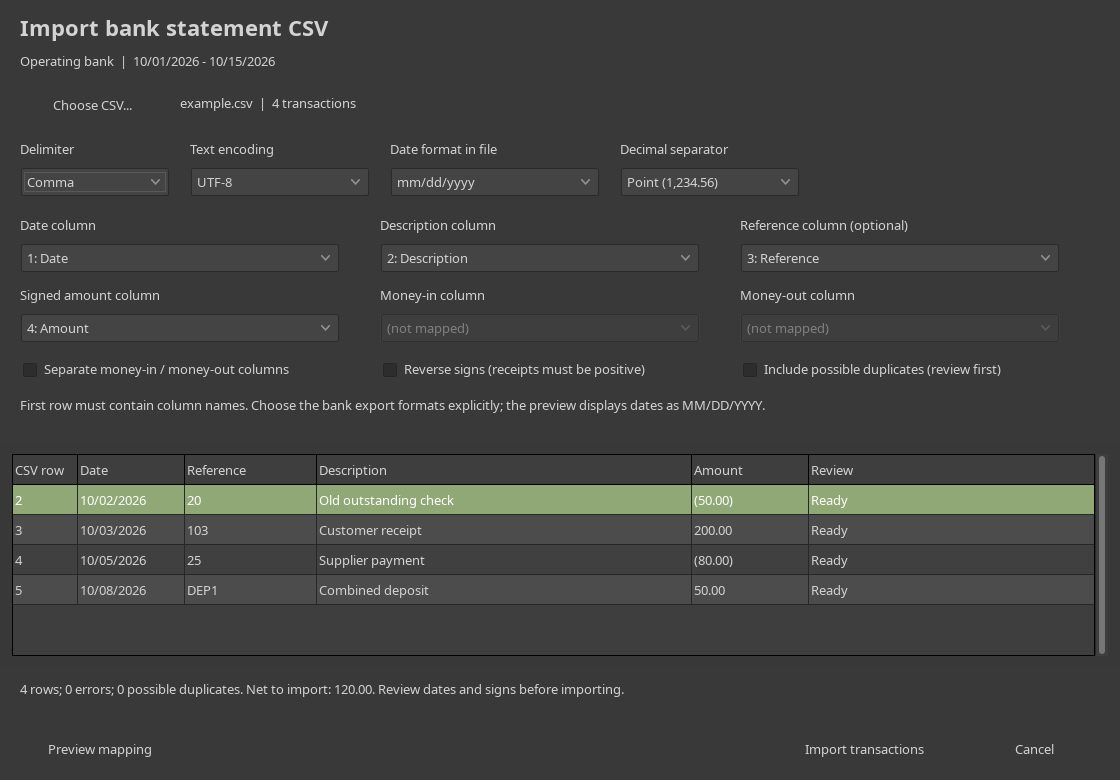
Choose the bank export file and map the date, description, reference, and amount columns. Select the date and number formats explicitly. A signed amount column or separate money-in and money-out columns are supported.
Match what cleared
Check the bank and ledger rows that belong together. Match one transaction to one entry, or combine several rows when a deposit or payment covers multiple entries. Suggested matches select a unique amount within three days for you to review.
Review outstanding items and complete
Leave uncleared checks and deposits outstanding. Completion requires the imported activity to agree with the statement, every bank transaction to be matched, and the ledger less outstanding items to equal the statement ending balance.
Importing and matching do not post journal entries. Record bank fees, interest, or corrections through the existing General Ledger workflow, then refresh the Banking Center to include them.
Review the import before it becomes part of the statement.
The preview shows dates, references, descriptions, amounts, and any errors or possible duplicates. Receipts are positive and payments are negative. Resolve preview errors before importing the file.
- Map a signed amount column, or separate money-in and money-out columns.
- Choose month/day/year, day/month/year, or year-month-day dates, and a decimal point or decimal comma.
- Read comma-, semicolon-, or tab-separated exports in UTF-8 or Windows-1252.
- Reject an exact repeated import and skip possible duplicate rows by default. Include a possible duplicate only after verifying it represents an additional transaction.
This first version works with CSV exports and amounts in the ledger currency. Direct bank feeds, OFX/QFX import, foreign-currency conversion, and automatic posting rules are not included.
Keep the reconciliation and the decisions behind it.
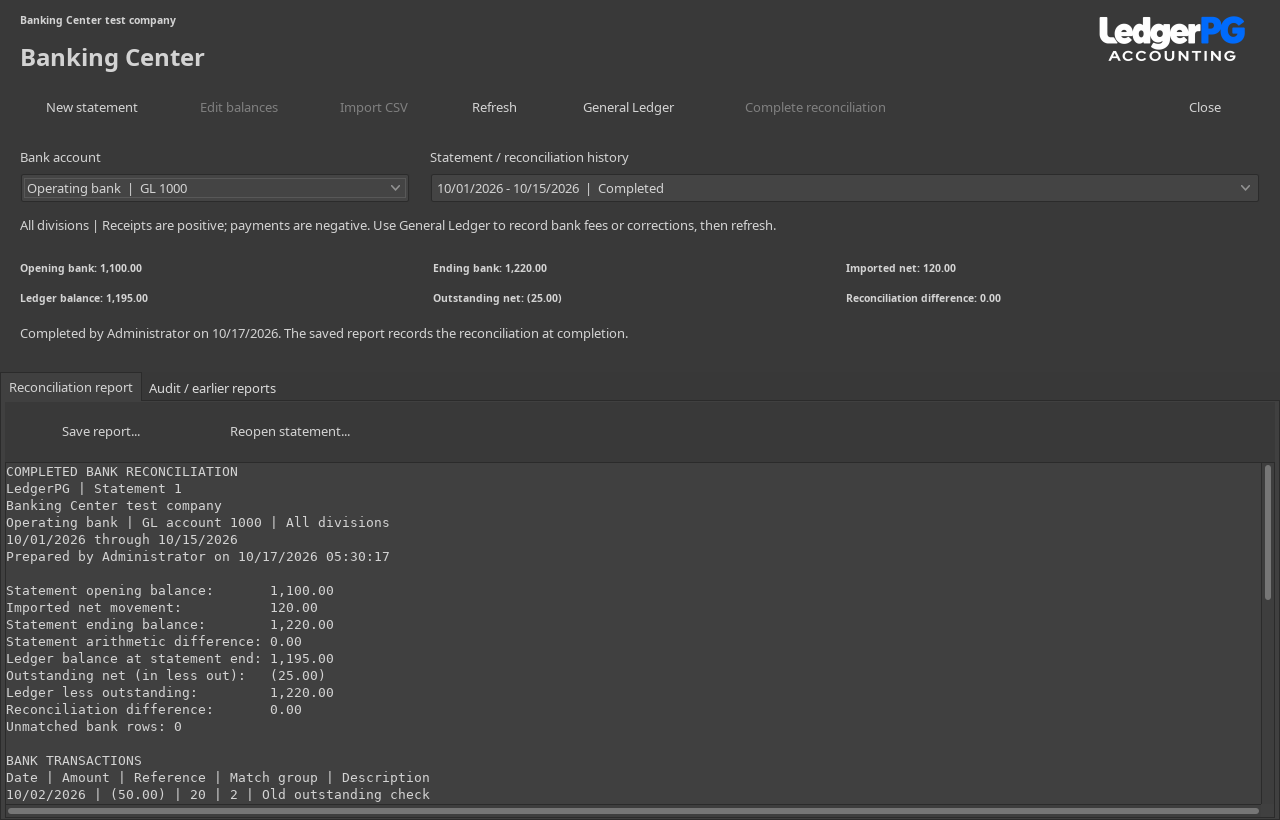
Completing a reconciliation saves a report of its balances, bank transactions, matched ledger entries, and outstanding items. View it in the Banking Center or save it as a text report. The audit history records imports, matches, corrections, and completion.
- A consistent statement sequence
- One unfinished statement per GL account keeps the work together. The next statement carries forward the previous ending balance and begins on the following day.
- Corrections with a history
- An administrator can reopen the latest completed statement when no later draft exists, with a recorded reason. Earlier completed reports stay in the history.
- Permissions for the work
- Active GL users can view the center. Changes require GL and Posting permission, or administrator access. Conflicting edits require a refresh; changes to previously cleared source entries block completion until reviewed.
Getting started in LedgerPG.
- Configure each bank with its own GL account in Banks, and set up accounting periods covering the statement.
- Open Banking Center below Banks on the console, or press Ctrl + Shift + K. An administrator opens it once per company to initialize the new tables.
- On the first reconciliation, use Clear before start only for older ledger entries that had already cleared before the statement began. Leave older outstanding checks and deposits uncleared.
- Create the statement, preview the CSV, and work through the matches. After completion, view or export the saved report from the statement history.
The Banking Center is implemented in the current LedgerPG development build. A public PG installer is not listed yet; contact us about trying it with your business workflow.